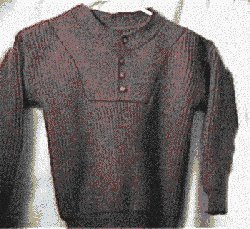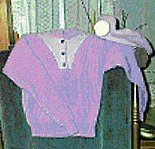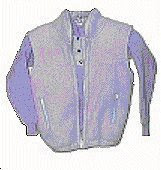


The brown sweater is a Fisherman Rib boys fatigue sweater with full needle rib yoke. The lilac pullover is a Fisherman Rib sweater also but the yoke is a 1 x 1 fairisle, I used pattern 30 in Stitch World 1 which is a seed stitch. On the right corner at the top you'll see a matching beret. The hat part of the beret (the top) is polar fleece. The band is the same fairisle I used on the fatigue yoke. I also used up some scrap polar fleece for the white flower that embellishes the hat. On the bottom right is the lilac pullover with a matching polarfleece vest. The vest is trimmed with the same fairisle as the yoke of the fatigue.
I've always wanted to make my husband a Fisherman Rib pullover like the ones I've seen in all the sports catalogs called a Fatigue Sweater. Fisherman rib is so comfy and the fatigue would be a little dressier than a plain pullover. I love the look. When DAK 6 came out, I discovered a secret that makes this particular sweater really easy to design. In this lesson we will learn how to start with a standard garment shape and tweak it to our personal specifications in Original Pattern Drafting.
SOME KNITTING AND CHARTING HINTS FOR THE FATIGUE SWEATER:
1. DAK is wonderful, it allows you to use 2 different gauges, 1 for the body and 1 for the yoke. However, make all your body pieces before you make the yoke. This way you won’t forget to change the tension back after making the yoke. Also be sure to make a note in Tension notes, write down both tensions so that when you switch back, you won't have forgotten.
2. On the back, Chart the back with a neckline curve but make the back neck straight. That little half inch doesn’t make a big difference in the finished garment so you really don’t need the curve but you do need to make sure you have the same number of stitches on the back shoulders as you have on the front shoulder + yoke shoulder piece.
3. Make your tension swatches about a week before you actually start the garment. Tuck stitch takes a lot of weight and it’s going to be about a week of resting before you can really measure that swatch. Also, make your swatches 100 X 100. Don’t forget, you need a separate swatch for the yoke since it’s full needle rib. You can then practice your sewing machine buttonholes on the full needle rib swatch.
4. Add another 1" width to your sleeve cuff because your sleeve gauge is set for tuck which knits wide and your cuff will be plain rib which is thinner.
5. Make sure you make the front opening deep because you are going to have to join both shoulders to make the neck rib. I went 8" deep on mine and that was plenty for a commercial neckline ( I did it as if I were doing a cut and sew neck but of course, it wasn't cut and sew 4 inches stockinette, 7 inches 1 x 1 rib, 4 inches stockinette.
Start with Standard Garment Shaping and select New Garment. Pick Adult, Male, Sweater, Straight Sleeves, Straight Front Neck, Straight Back Neck. Click on OK.
Select your tension size (hint) I always design in a standard size of 7 sts 10 rows per inch when I first start. This can always be changed after you've designed your garment and have actually done your tension swatch. Click on OK and then pick Classic Ease.
You will be asked to select your size. I usually start with a standard size, by going with the chest size I wish to make, i.e. my husband measures 40" but wears a size 44 so I select the Standard Size 44. I work through the body measurements but I change ease to 0 at chest and hip. He likes his sweaters to be 17" from bottom hem to underarm and I know his pullovers need to be 11" from underarm to shoulder. The Nape To Garment Length will be 28" less 3" for bottom rib so I put in 25" . I pretty much go with default on all the other measurements for my husband but this is where you need to customize the size to fit your guy. This is my preferred method of working with sizes, you may like to do it another way.
It's time to go into Original Pattern Drafting. Click that Icon (it's the second set of Icons from the top showing pattern pieces). You will be asked to save your work, by giving it a name. Go ahead and call it Fatigue if you wish.
Working with Original Pattern Drafting:
You'll see your garment pieces on the screen. Go ahead and delete one of the sleeves, they are both the same and 2 of anything that is the same is unnecessary, especially if you need to print out your pattern shapes.
Click on one of the body pieces. Press the Space Bar to turn on the large cursor.
Using the Measure Edge Tool:
I like to check my measurements before I go any farther.
Using the Measure Edge Tool:
I like to check my measurements before I go any farther.
First I delete one of the points at the underarm on both pieces. Then I use the Measure Edge tool (the middle measuring tape at the bottom left) to make sure that I have 11" underarm to shoulder and 14" underarm to hem (remember I want 3" rib at the bottom and the bottom ribbing doesn't show in DAK).
When you use the Measure Edge tool you must go clockwise. If you want to turn off any measurement that is showing on the screen later, click on the Measure Edge tool and then click the point where you started the measurement. This is important, if you clone a piece later (as we will) you won't be able to turn off the measurement numbers once you've changed the garment if you delete that first point.
Using Origin:
I like to move my 0 point (the Origin which is the first measuring tape on the bottom left)around a lot because it makes things to easy to measure if you can start with 0. Remember you have to start and end with a point so moving Origin to the starting point only makes sense. Then you can watch the numbers change on the bottom right corner as you move your mouse around. Moving Origin to a starting point also makes the Piece Table option easier to use.
Using the Piece Table Option:
Turn on Numbering (to the right of the large crosshair icon on the bottom left) use the Piece, Table option to get measurements absolutely correct. X stands for your horizontal measurements and Y for the Vertical measurements. The Minus in front of a number denotes points to the left of 0 in the X measurement and below 0 on the Y measurement. Make sure both the front and back piece have the same measurements. (if you are unsure which piece you are working on, check the top of your screen, it will tell you which one is highlighted).
Select your Front piece. Mine happens to be the first piece on the left. Measure the neck opening. You want it to be 8.6" on the front and back pieces both. If it isn't insert a point at the middle bottom of the garment. Do this by selecting the Equal Parts Icon, tell it you want to insert 1 point and place the crosshair between the 2 bottom side points. Click on the left mouse button and you will have a point inserted right in the middle of the piece. Click on Origin and then click on the new middle point you've just created. This is all done so that when you move something with Mirror on, you can be sure it will be done the same on both sides of 0. If you don't have the origin in the middle, I can't predict the awful results you'll get but before you click the mouse button again, you can always Edit, Undo if you get something disastrous. Click on Vertical Mirror. Double click on one of the neck points and move it until the neck measurement is 8.5". Don't forget to change the back neck measurement to correspond but then come back to highlight the front.
On the front, Insert a point at the middle of the neck by again, click on the Equal Parts Icon. Put in 1 for number of points to add and click left mouse button. Click OK. Place the crosshair between the 2 neck points and click the left mouse button.
Select Origin and click on that middle point. Make sure your Mirrors are Off. (If they are darkened, they are On, click on them to deselect them). Place the cursor at the middle neck point and double click the left mouse button.(The cursor turns into a pair of pliers signifying you are moving a point). Drag the mouse down to 1" above the armhole , making a V. Click the Left mouse button to place the point. Now move the point to 2.5" to the left of the middle (origin) by double clicking the V and watching the measurements at the right bottom of the screen.
Remember, you can use the arrow keys on the keyboard to more precisely control the cursor movements. Your V will now be cockeyed, shorter on the left. Select F2 to add a point and add a point to the neck anyplace to the right of the one you just moved. Select F2 again to turn off Add. Double click the new point and move it down until it's at 2.5" to the right of the middle and again 1" above the armhole point. You should now have a V shape neckline that doesn't come to a point but is straight across at the bottom, 5" wide. Be sure to turn off all measuring references now. You don't want the red lines and red inch references because you won't be able to delete them later. To turn them off, click on the middle measuring Tape at bottom left and then click on the beginning point of your measurement i.e. you measured your right armhole starting at the top shoulder point and moving down to armhole point. To delete that, click on measure and then click on the top shoulder point. The reference will disappear.
Making that yoke:
You are going to be amazed at how easy it is to chart a yoke to fit in that front space you just made. Make sure your front is still highlighted. Select Piece, Copy. Call the new piece Yoke. Select Shift F2 for Delete and start deleting points on the new piece. Start at one bottom corner and click. Then the center bottom and the other bottom corner. Now the next 2 points going up. All you have left to delete are 2 points that were the shoulder, delete them and you have an inset piece for your yoke. It's fun at this point to drag the inset over to your old front piece and place it, it fits!!!
Making your Front neckline curve and plackets
Using the magnifying glass, magnify the yoke to make it easier to work. Put your origin at the top of the yoke. Use the Equal Parts Icon and divide the bottom of the yoke into 2 equal parts by selecting 1 when it asks you how many points. Select Alter, Curve. Select 5 points and neckline # 1. Bring the curve down 2.5". (since we've made the neckline a little wider than usual at 8.5", you can get away with a little shorter drop. Also, no one is going to button that fatigue all the way up). Use Shift F2 to delete ½ of the yoke by deleting all the points on the right of the piece. Use Shift F2 again to turn off delete.
You'll want to knit it the placket as you knit the yoke piece so you have to decide how wide you will want it to be and add that width to the placket. When you knit it, you'll knit one side, go back into Original and flip the yoke and knit it again. I have decided that I want my placket to be 1" wide and I add the width now by double clicking on the top right point and moving out 1" then double click on the bottom right and move it out 1". Placing Origin at the right of the yoke and turning on the large crosshair cursor (space bar) makes this job very easy.
That should do it. To finish up, you want to check to make sure your sleeve top measures double the front or back armhole amount.
You'll need to make 2 swatches for this project, one in Fisherman rib for the body and 1 in full needle rib for the yoke. The yoke can also be plain stockinette, it's up to you, you are the designer but you'll still need 2 gauge swatches. Don't forget to change the gauge in DAK when you knit the different pieces so that it will chart correctly for you.
Feel free to make copies of this page for your personal use or for use in classes . The following copyright notice must appear on all copies Copyright © Rosalind Porter, Piney Mountain Cottage, 1997-2008

No comments:
Post a Comment